Grove - Serial Camera
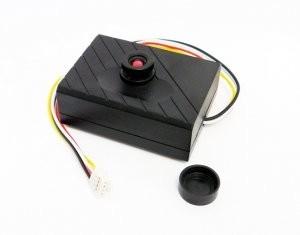
The Serial Camera is a JPEG color camera module easy for MCU use.It has integrated image processing DSP to generate 320240 or 640480 JPEG image without thumbnail information, Captured picture will be stored in internal buffer and transferred via UART port.

Features
- Grove Interface
- JPEG compressed image without Thumbnail Information
- 5V power supply
- Small and compact
- Protocol control
More details about Grove modules please refer to [Grove System](https://wiki.seeedstudio.com/Grove_System/)
Specifications
| Item | Min | Typical | Max | Unit |
|---|---|---|---|---|
| Operating Voltage | 4,8 | 5.0 | 5.3 | V |
| Resolution (default) | 640x480 / 320x240 | / | ||
| Default Baud rate of serial port | 115200 | Baud | ||
Platforms Supported
| Arduino | Raspberry Pi | |||
|---|---|---|---|---|
The platforms mentioned above as supported is/are an indication of the module's software or theoritical compatibility. We only provide software library or code examples for Arduino platform in most cases. It is not possible to provide software library / demo code for all possible MCU platforms. Hence, users have to write their own software library.
Application Ideas
- Digital Cameras with the SD card shield
- Video monitoring system
Usage
Use Camera on PC
Step 1:Download dedicated serial port debugging tool VC0703COMTOOL.rar and install it.
Step 2: Connect Serial camera to PC with USB to use serial converter tool UartSBee
| Serial camera | Uart_SB v3.1 |
|---|---|
| GND (black) | GND |
| VCC (red) | VCC |
| RX (white) | TX |
| TX (Yellow) | RX |
Step 3: Connect the Uart_SB v3.1 with Computer and Open the vc0703CommTool software. Choose the correct COM number of the port you link to the camera, default baudrate 115200 ,and then open the port.
Step 4: Click the button "Get Version" and it will reset the camera.
Step 5: Click the button "Fbuf" to get ready to take a picture.
Click "stop CFbuf" to take a picture.
Click "Sel File" to select the file name to store the picture.
Click "Read" to read the data from the buffer to store in the file selected as shown below:

Click "Resume" to resume frame update so you can continue to take another picture.
Use Camera with Arduino and SD card
Step 1: Connected Grove - Serial Camera to Arduino board, Hardware parts include Seeeduino V3.0, SD Card Shield, SanDisk microSD™ Card 2GB, Grove - Button.
Step 2: Change the serial receive buffer(default 64 bytes) to 128 bytes. Open up hardware/arduino/cores directory, and edit the file named wiring_serial.c or HardwareSerial.cpp near the top is a #define SERIAL_BUFFER_SIZE 64, which means 64 bytes are used for the buffer. You need to change this to 128 .More details, please refer to Arduino Hacks.
Step 3: Download the Grove - Serial Camera Library, upload it to Seeeduino. If it can't be complied, please confirm if the SD Library is in your Arduino IDE folder.
Step 4: Open the Serial Monitor , press the button to take picture after SD card and Camera initialization.
Resources
Tech Support & Product Discussion
Thank you for choosing our products! We are here to provide you with different support to ensure that your experience with our products is as smooth as possible. We offer several communication channels to cater to different preferences and needs.