EcoEye–Embedded_Vision_Camera Introduction
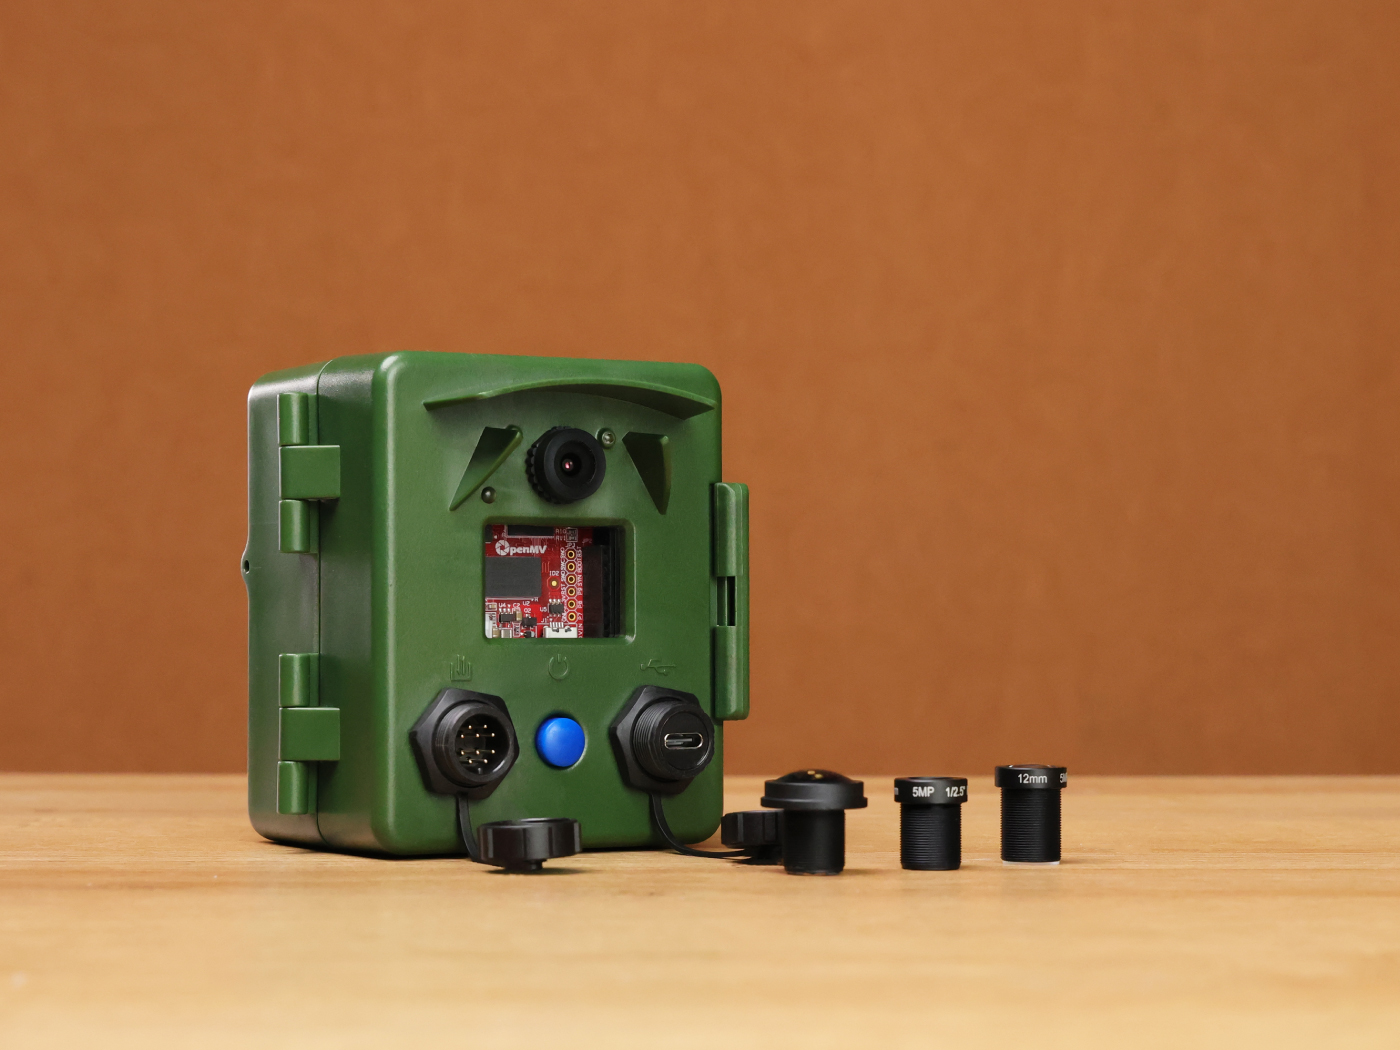
EcoEye is a camera with on-board machine vision capabilities encased in a portable and waterproof housing designed for remote deployments. Based on the openMV H7 Plus Cam, it is easy to set up and flexible to numerous applications. The internal power management and control system enables long-term operation and allows the integration of solar panel, countless sensors, and other external devices. The camera is thoroughly field tested, and results published in a scientific article.

Getting Started
Before starting this guide and to keep it simple, please get familiar with the hardware and software of the ecoEye described in the User Guide.
Preparing the Hardware
Open the ecoEye camera and insert 3 equally charged lithium-ion 18650 batteries with the same capacity in the designated compartment while respecting the polarity markings. On the openMV board, install a formatted micro-SD card with at least 8GB storage capacity.
Preparing the Software
Download and install the openMV IDE to your computer. Open the software and plug the USB-A to USB-C cable between the computer and the external connector on the ecoEye camera. After pressing the push button once, the LED on the front side should flash green a few times before shining white for half a second. Now, the computer should recognize the device card and open a window with the content on the SD card. You can now copy all the script files found here. At the same time, a USB logo should have appeared next to the plug symbol in the bottom left corner of the IDE interface. Click this button to establish the connection with the camera. If prompted to update the firmware, click yes and go through the steps to do so.
Open the ecomain.py code and run it by pressing the green play button in the bottom left corner. Sometimes an OSError will occur. Just ignore it and try again. The camera is now running in continuous mode without saving any images but displaying them on the IDE frame buffer. By changing the MODE parameter to 2 and running the script again, the camera will save all the capture images.
To allow the camera to run without necessarily being connected to the computer and IDE, the ecomain.py script with adjusted parameters to achieve the desired application must be renamed as main.py, still located on the root of the SD card. This can also be done by navigating to Tools > Save open script to OpenMV Cam (as main.py) in the tabs of the openMV IDE while still connected with the camera.
When starting a deployment without connection to the IDE, the user must press the push button once to turn on the system, and once again when the front LED shines blue to confirm the start of a run. Similarly, to turn stop a deployment and turn the system off, the user must press the push button a first time and then again when the light blue LED turns on (which can take a few seconds). A long press on the push button will force turn off the system but is not recommended if not necessary.
Create your first object detection application
For this step-by-step guide, we will collect data using the ecoEye camera, train a model by manually identifying objects in the dataset using edge impulse, and finally run the create model on the camera while observing the results.
Collecting data
Place the camera in front of a flat monocolour surface such as a wall, a white board or even facing down on the table. Connect it to the IDE and run MODE 0 to see the captured images. If necessary, re-position the camera so that o foreign objects appear in front of the background. While looking at the live image on the frame buffer, carefully adjust the focus by turning the lens. Once the perfect focus found, stop the script and gather 2 or 3 different type of objects that you would like to classify. Now, change the MODE parameter to 2 and run the script again. The images shown in the frame buffer are also saved onto the SD card. While leaving the script running place the objects in front of the camera in different positions, places and in different combinations. Once gathered around 100 good images, stop the script and reset the openMV cam (in Tools > Reset) to see the folder with all the saved images.


Training the model
After selecting about 100 images for the model, log into your Edge Impulse account and create a new project. In Data Acquisition from the left menu, upload the selected images as a dataset. Now, each individual image in both the training and test datasets must be labelled manually by clicking the three dots next to the image and selecting Edit labels. Make sure to always use the same names for each type of object which can be check with the filter button.

Next, navigate to Create impulse in the left menu. Add a processing block type Image and a learning block type Object Detection (Images) and save the impulse. After that, greyed Images and Object detection labels should have appeared in the left menu under Impulse Design. In the new Images tab, leave everything as is, simply click the Save parameters and Generate features buttons. After this process is done, the model can be trained in the Object detection tab leaving the parameters by default for now.

To test the performance of the new model, go to the Model testing tab in the left Menu and click Classify all. This will run the object detection model on the test dataset that was labelled in the beginning but was not used for training and is therefore unseen to the model. Once done, the result will show the model accuracy and the wrongly classified objects. If the final score is not satisfying, either the image dataset can be improved, or the training parameters tweaked.

To export the model for the ecoEye camera, navigate to the Deployment tab in the left menu. Search and select the openMV Library before hitting Build. From the automatically downloaded zip file, extract the files and copy the labels.txt and trained.tflite files to the SD card.
Running the model
We can now run the camera with automatic object classification using the trained model. In the ecomain.py file, change the parameters MODE = 1, sensor_windowing = True, classify_mode = “objects” and indicators = True. Run the script while paying attention to press the push button when the blue LED turns on or the serial terminal prints out ‘Waiting for second button press...’. The frame buffer should now show the captured images with bounding boxes around an object whenever the model detects one of the objects it was trained on. These images are also saved on the SD card and the detections with the coordinates of the bounding boxes are saved in a csv file.


This application can also be produced without connection to the IDE by just renaming the ecomain.py to main.py, disconnecting the cable and starting the script with the two-push button procedure.
Resources
Tech Support & Product Discussion
Thank you for choosing our products! We are here to provide you with different support to ensure that your experience with our products is as smooth as possible. We offer several communication channels to cater to different preferences and needs.