How to Add Seeed boards to Arduino IDE
Seeed had designed so many boards that work with Arduino IDE, include,
- Seeeduino XIAO
- Seeeduino Wio Terminal
- Seeeduino Lotus Cortex-M0+
- Seeeduino LoRaWAN/GPS
- Seeeduino Cortex M0
The board mentioned above is the AT SAMD21 Microcontroller series,Please copy the below url to Additional Boards Manager URLs in the step2 .
https://files.seeedstudio.com/arduino/package_seeeduino_boards_index.json
- Seeeduino V3/4
- Seeeduino Lotus
- Seeeduino Stalker V2.3/3/3.1
- Seeeduino Lite
- Seeeduino Mega
- Seeeduino Mega Protoshield Kit
- Seeeduino GPRS
- Seeeduino Ethernet
- Seeeduino Cloud
- Seeeduino Nano
- Seeeduino Crypto (ATmega4809 ECC608)
- LinkIt ONE
- RePhone Series
The board mentioned above from Seeeduino V3 to RePhone Series isn't the AT SAMD21 Microcontroller series,Please copy the below url to Additional Boards Manager URLs in the step2.
https://raw.githubusercontent.com/Seeed-Studio/Seeed_Platform/master/package_legacy_seeeduino_boards_index.json
Thanks to the new features of Arduino IDE, it's easy to add those board to your Arduino IDE now.
There're few step to be followed.
Step 1. Download the latest Arduino IDE
You need a Arduino IDE that after version 1.6.4, please download one if there's no Arduino IDE in your computer.

Step 2. Setting your Arduino IDE
Open your Arudino IDE, click on File > Preferences, and copy below url to Additional Boards Manager URLs

Step 3. Board Manager
Click on Toos > Board > Board Manager.
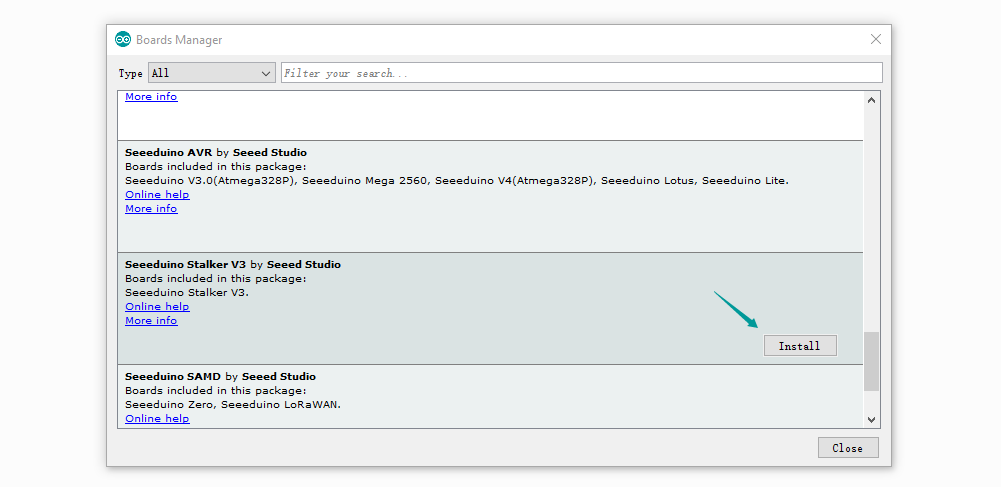
Now you can search the board by name, if you need to use LinkIt ONE, then just search LinkIt; and if you need to use RePhone Series,
just tap RePhone. In this wiki, we will take Seeeduino Stalker V3 example.
Click Seeeduino Stalker V3 then an Install button appear, click on it to finish the step, this process takes about 5 minutes to half an hour, which depend on the speed of your network.
Step 4. Select a board
After Step 3 was successful, a board named Seeeduino Stalker V3 will show up at the boards list.
Click on Tools > Board, Seeeduino Stalker V3 is available now.
Tech Support & Product Discussion
Thank you for choosing our products! We are here to provide you with different support to ensure that your experience with our products is as smooth as possible. We offer several communication channels to cater to different preferences and needs.