YOLOv8 pose estimation model deployment
This wiki will introduce how to train the official YOLOv8 attitude estimation model and deploy the trained model to Grove Vision AI(V2) or XIAO ESP32S3 devices.
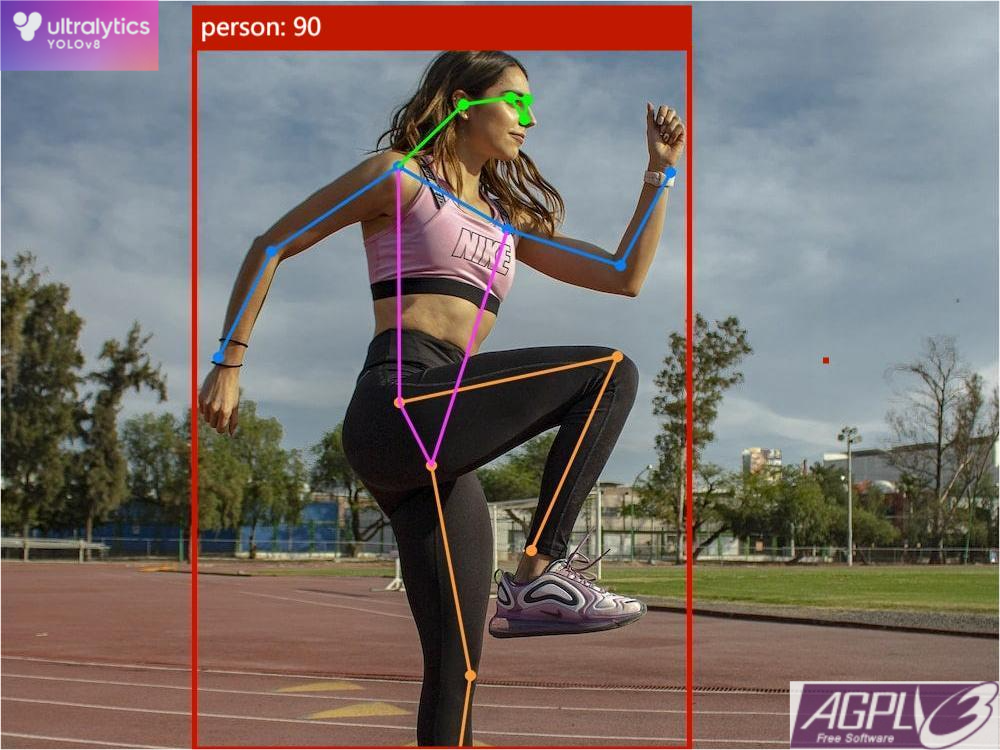
Dataset preparation
For the pose estimation data set, it is recommended to check YOLOv8 official documentation.
Install YOLOv8 command line tool
- By default, you already have the
pythonenvironment andpippackage management tool, and python>=3.8.
# Clone the official repository
git clone https://github.com/ultralytics/ultralytics

# Go into the cloned folder
cd ultralytics

# Install in developer mode so that subsequent modifications can be synchronized
pip install -e .
The reason why it is recommended to install using Git is that some code needs to be modified later, so it needs to be installed in developer mode.
- You can use the version query command to test whether the
yolocommand line tool is successfully installed.
# Version query
yolo -v
Train
First, go to the downloaded data set folder
Execute the following command to start training the model
yolo train detect model=yolov8n-pose.pt data=./data_pose.yaml imgsz=192
Export model to tflite
After training, the model will be in the
runs/train/exp*/weights/folder. Make sure that the evaluation indicators of your model meet your needs.Afterwards, you need to modify the official code to reduce some post-processing of the model. First modify the
forwardfunctions of theDetectandPoseclasses under the~/ultralytics/ultralytics/nn/modules/head.pyfile. After modification, it is as follows Show
# forward function of Detect class
    def forward(self, x):
        """Concatenates and returns predicted bounding boxes and class probabilities."""
        shape = x[0].shape  # BCHW

        if self.export:
            return [
                torch.permute(j, (0, 2, 3, 1)).reshape(j.shape[0], -1, x.shape[1])
                for j in [self.cv2[i](x[i]) for i in range(self.nl)]
                + [self.cv3[i](x[i]) for i in range(self.nl)]
            ]
        else:
            for i in range(self.nl):
                x[i] = torch.cat((self.cv2[i](x[i]), self.cv3[i](x[i])), 1)
        if self.training:
            return x
        elif self.dynamic or self.shape != shape:
            self.anchors, self.strides = (
                x.transpose(0, 1) for x in make_anchors(x, self.stride, 0.5)
            )
            self.shape = shape

        x_cat = torch.cat([xi.view(shape[0], self.no, -1) for xi in x], 2)
        if self.export and self.format in (
            "saved_model",
            "pb",
            "tflite",
            "edgetpu",
            "tfjs",
        ):  # avoid TF FlexSplitV ops
            box = x_cat[:, : self.reg_max * 4]
            cls = x_cat[:, self.reg_max * 4 :]
        else:
            box, cls = x_cat.split((self.reg_max * 4, self.nc), 1)
        dbox = (
            dist2bbox(self.dfl(box), self.anchors.unsqueeze(0), xywh=True, dim=1)
            * self.strides
        )

        if self.export and self.format in ("tflite", "edgetpu"):
            # Normalize xywh with image size to mitigate quantization error of TFLite integer models as done in YOLOv5:
            # https://github.com/ultralytics/yolov5/blob/0c8de3fca4a702f8ff5c435e67f378d1fce70243/models/tf.py#L307-L309
            # See this PR for details: https://github.com/ultralytics/ultralytics/pull/1695
            img_h = shape[2] * self.stride[0]
            img_w = shape[3] * self.stride[0]
            img_size = torch.tensor(
                [img_w, img_h, img_w, img_h], device=dbox.device
            ).reshape(1, 4, 1)
            dbox /= img_size

        y = torch.cat((dbox, cls.sigmoid()), 1)
        return y if self.export else (y, x)

# forward function of Pose class
    def forward(self, x):
        """Perform forward pass through YOLO model and return predictions."""
        bs = x[0].shape[0]  # batch size
        kpt = torch.cat([self.cv4[i](x[i]).view(bs, self.nk, -1) for i in range(self.nl)], -1)  # (bs, 17*3, h*w)
        x = self.detect(self, x)
        if self.training:
            return x, kpt
        if self.export:
            return x, torch.permute(kpt, (0, 2, 1))
        pred_kpt = self.kpts_decode(bs, kpt)
        return torch.cat([x, pred_kpt], 1) if self.export else (torch.cat([x[0], pred_kpt], 1), (x[1], kpt))
- In order to avoid abnormal errors on the command line, you can also modify the
export_saved_modelmethod code of theExporterclass under the~/ultralytics/ultralytics/engine/exporter.pyfile as follows
    @try_export
    def export_saved_model(self, prefix=colorstr('TensorFlow SavedModel:')):
        """YOLOv8 TensorFlow SavedModel export."""
        cuda = torch.cuda.is_available()
        try:
            import tensorflow as tf  # noqa
        except ImportError:
            check_requirements(f"tensorflow{'-macos' if MACOS else '-aarch64' if ARM64 else '' if cuda else '-cpu'}")
            import tensorflow as tf  # noqa
        check_requirements(
            ('onnx', 'onnx2tf>=1.15.4,<=1.17.5', 'sng4onnx>=1.0.1', 'onnxsim>=0.4.33', 'onnx_graphsurgeon>=0.3.26',
             'tflite_support', 'onnxruntime-gpu' if cuda else 'onnxruntime'),
            cmds='--extra-index-url https://pypi.ngc.nvidia.com')  # onnx_graphsurgeon only on NVIDIA

        LOGGER.info(f'\n{prefix} starting export with tensorflow {tf.__version__}...')
        check_version(tf.__version__,
                      '<=2.13.1',
                      name='tensorflow',
                      verbose=True,
                      msg='https://github.com/ultralytics/ultralytics/issues/5161')
        f = Path(str(self.file).replace(self.file.suffix, '_saved_model'))
        if f.is_dir():
            import shutil
            shutil.rmtree(f)  # delete output folder

        # Pre-download calibration file to fix https://github.com/PINTO0309/onnx2tf/issues/545
        onnx2tf_file = Path('calibration_image_sample_data_20x128x128x3_float32.npy')
        if not onnx2tf_file.exists():
            attempt_download_asset(f'{onnx2tf_file}.zip', unzip=True, delete=True)

        # Export to ONNX
        self.args.simplify = True
        f_onnx, _ = self.export_onnx()

        # Export to TF
        tmp_file = f / 'tmp_tflite_int8_calibration_images.npy'  # int8 calibration images file
        if self.args.int8:
            verbosity = '--verbosity info'
            if self.args.data:
                # Generate calibration data for integer quantization
                LOGGER.info(f"{prefix} collecting INT8 calibration images from 'data={self.args.data}'")
                data = check_det_dataset(self.args.data)
                dataset = YOLODataset(data['val'], data=data, imgsz=self.imgsz[0], augment=False)
                images = []
                for i, batch in enumerate(dataset):
                    if i >= 100:  # maximum number of calibration images
                        break
                    im = batch['img'].permute(1, 2, 0)[None]  # list to nparray, CHW to BHWC
                    images.append(im)
                f.mkdir()
                images = torch.cat(images, 0).float()
                # mean = images.view(-1, 3).mean(0)  # imagenet mean [123.675, 116.28, 103.53]
                # std = images.view(-1, 3).std(0)  # imagenet std [58.395, 57.12, 57.375]
                np.save(str(tmp_file), images.numpy())  # BHWC
                int8 = f'-oiqt -qt per-tensor -cind images "{tmp_file}" "[[[[0, 0, 0]]]]" "[[[[255, 255, 255]]]]"'
            else:
                int8 = '-oiqt -qt per-tensor'
        else:
            verbosity = '--non_verbose'
            int8 = ''

        cmd = f'onnx2tf -i "{f_onnx}" -o "{f}" -nuo {verbosity} {int8}'.strip()
        LOGGER.info(f"{prefix} running '{cmd}'")
        subprocess.run(cmd, shell=True)
        yaml_save(f / 'metadata.yaml', self.metadata)  # add metadata.yaml

        # Remove/rename TFLite models
        if self.args.int8:
            tmp_file.unlink(missing_ok=True)
            for file in f.rglob('*_dynamic_range_quant.tflite'):
                file.rename(file.with_name(file.stem.replace('_dynamic_range_quant', '_int8') + file.suffix))
            for file in f.rglob('*_integer_quant_with_int16_act.tflite'):
                file.unlink()  # delete extra fp16 activation TFLite files

        # Add TFLite metadata
        # for file in f.rglob('*.tflite'):
            # f.unlink() if 'quant_with_int16_act.tflite' in str(f) else self._add_tflite_metadata(file)

        return str(f), tf.saved_model.load(f, tags=None, options=None)  # load saved_model as Keras model
- Use the following command to export the tflite model
yolo export model=${your model path} format=tflite imgsz=192 int8
- You will then see a
yolov8n-pose_saved_modelfolder under the current folder, which contains theyolov8n-pose_full_integer_quant.tflitemodel file, This model file can be deployed toGrove Vision AI(V2)orXIAO ESP32S3devices.
Model graph optimization
- Grove Vision AI (V2) supports vela-optimized models and can also accelerate model inference. First, execute the following command to install the vela command line tool (
XIAO ESP32S3device is not supported yet).
pip3 install ethos-u-vela
- After that, you need to download
velarelated configuration file, or copy the following content into a file, which can be namedvela_config.ini
; file: my_vela_cfg.ini ; -----------------------------------------------------------------------------
; Vela configuration file ; -----------------------------------------------------------------------------
; System Configuration

; My_Sys_Cfg
[System_Config.My_Sys_Cfg]
core_clock=400e6
axi0_port=Sram
axi1_port=OffChipFlash
Sram_clock_scale=1.0
Sram_burst_length=32
Sram_read_latency=16
Sram_write_latency=16
Dram_clock_scale=0.75
Dram_burst_length=128
Dram_read_latency=500
Dram_write_latency=250
OnChipFlash_clock_scale=0.25
OffChipFlash_clock_scale=0.015625
OffChipFlash_burst_length=32
OffChipFlash_read_latency=64
OffChipFlash_write_latency=64
; -----------------------------------------------------------------------------
; Memory Mode
; My_Mem_Mode_Parent
[Memory_Mode.My_Mem_Mode_Parent]
const_mem_area=Axi1
arena_mem_area=Axi0
cache_mem_area=Axi0
- Finally, use the following command to optimize the graph
vela --accelerator-config ethos-u55-64 \
    --config vela_config.ini \
    --system-config My_Sys_Cfg \
    --memory-mode My_Mem_Mode_Parent \
    --output-dir ${Save path of the optimized model} \
    ${The path of the tflite model that needs to be optimized}
Deploy
The model file that needs to be deployed is the
tflitefile exported above. You can burn the model file to the target device according to the following tutorial.We strongly recommend using our web tool to burn the trained tflite model into the device. Detailed operations are provided in the Deployment Tutorial
Note: Since the ESP32S3 device does not support model deployment after vela graph optimization, you do not need to perform tflite model graph optimization if you want to deploy the model to the XIAO ESP32S3 device.