Rainbow Cube kit - RGB 4*4*4 (Rainbowduino Compatible)

This is sold in a Kit form. For a fully assembled kit see Rainbow_Cube_Kit_Acrylic_Harness
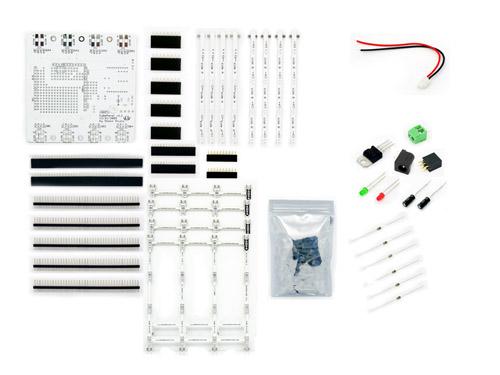
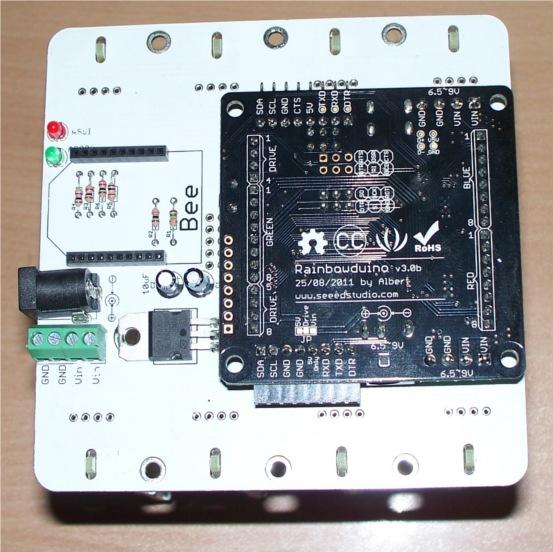
Unassembled Rainbow Cube Kit
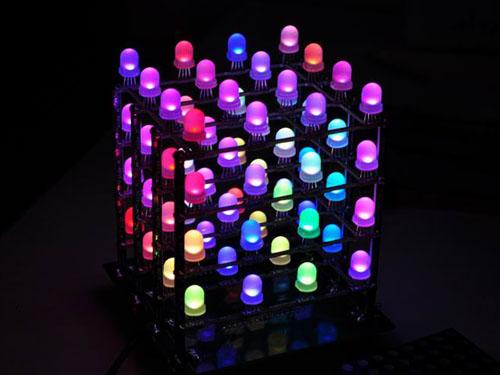
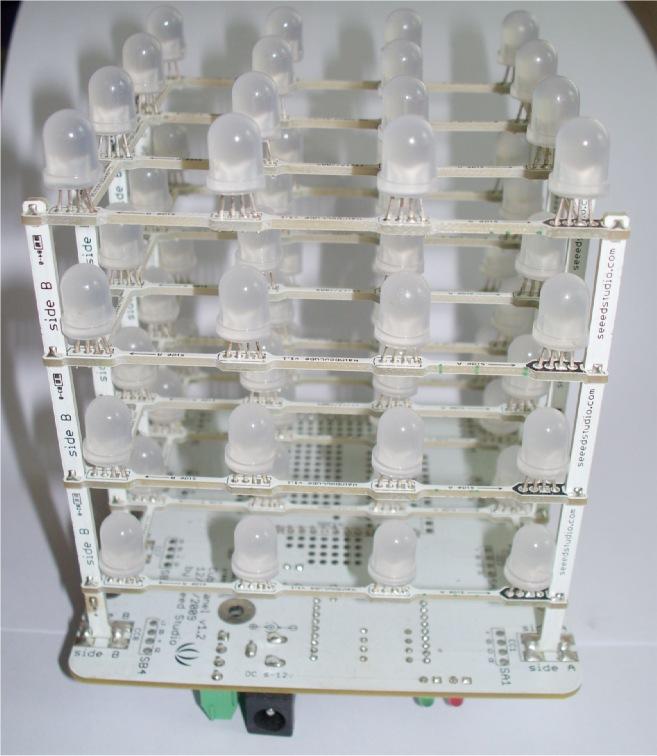
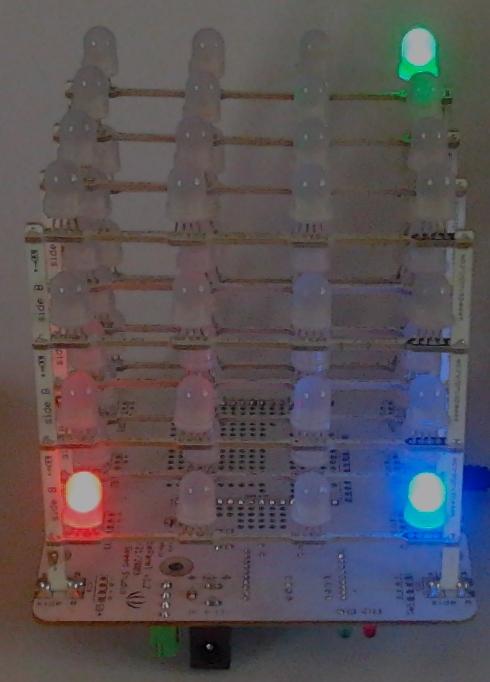
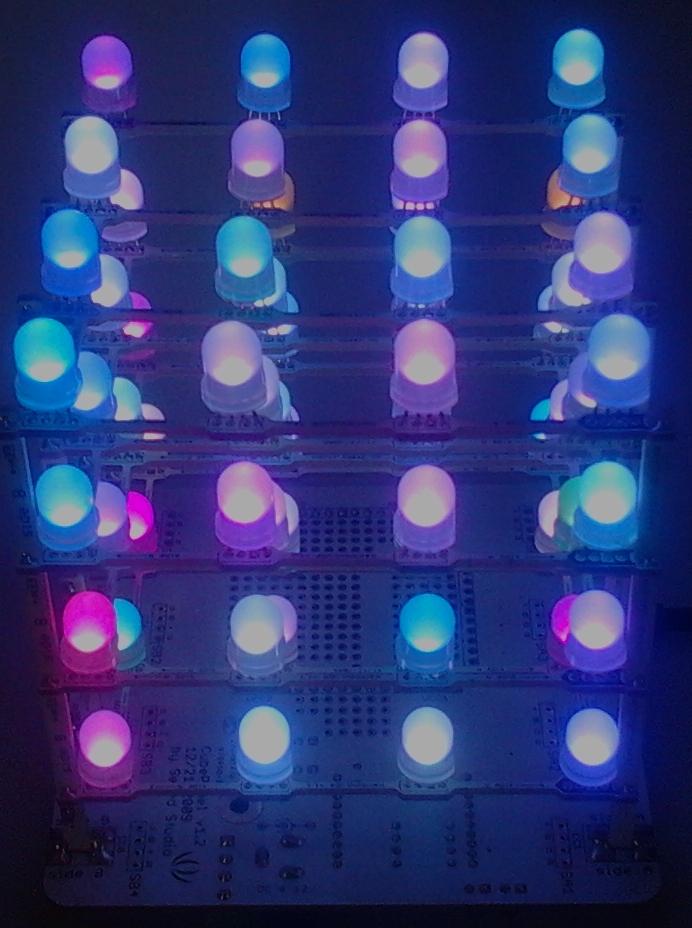
Rainbow Cube Kit illuminated with random colors
Kit Contents
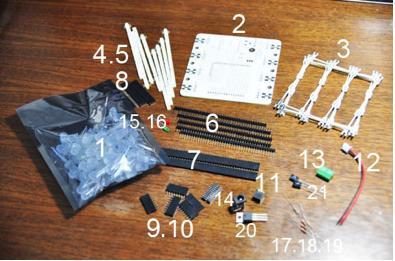
| 1. 8mm RGB LED x70 | 2. Cube Panel X1 | 3. Slim Panel PCB X4 |
| 4. Side A slim PCB X4 | 5. Side B slim PCB X4 | 6. 2.54mm 40pin male header X5 |
| 7. 2.54mm 40pin femail header X2 | 8. 2.54mm 16pin female header X3 | 9. 2.0mm 10pin female header X2 |
| 10. 8pin female header X5 | 11. 2X3 female header X1 | 12. JST power cable X1 |
| 13 3.5mm 4pin green terminal X1 | 14 3.5mm DC jack X1 | 15 3mm LED red X1 |
| 16. 3mm LED green X1 | 17. 1K 1/8w resistor X4 | 18. 10k 1/8w resistor X1 |
| 19. 15k 1/8w resistor X1 | 20. linear voltage regulator X1 | 21. 10uF_16v_E-CAP X2 |
Features
8mm RGB diffused LEDs.
4 x 4 x 4 arrangement
XBee compatible socket
Provides a 3.3V/1 Ampere LDO for power the Cube with unregulated DC 6-9V. Useful when not powered by USB.
Provides 8 Red, 8 Green and 8 Blue common cathode pins along with 8 Vcc pins in a 2 x 16 header pin.
- Controllable with a 8 x 8R,8G,8B multiplexed PWM LED driver like Rainbowduino.
Application Ideas
Colorful LED display : Mix various intensities of RED, GREEN and BLUE channels to produce different colors
Bright mood Lamp / Night lamp
Useful for artistic application.
Specification
- Operating Voltage
- 3.3V
- LEDs
8mm common anode RGB LED.
4 Leads (Blue-shortest lead,Green, Anode-longest lead, Red).
Max forward current IF = 20mA.
Pin definition and Rating
All pins are accessible from the Panel board show below.
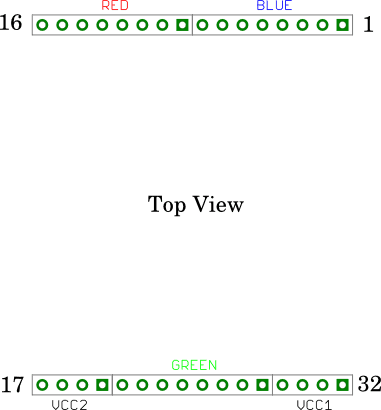
- Rainbow Cube kit provides 2 x 16 pin header for connecting to RGB LEDs driver board like Rainbowduino.
- xBee Socket
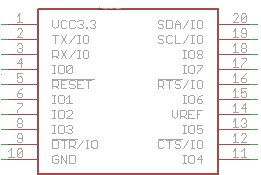
DC Jack Pin
Middle Pin VIN (6-9DCV)
- Side barrel: GND
4 pin Green terminal.
- 2 GND pins, 2 VIN pins
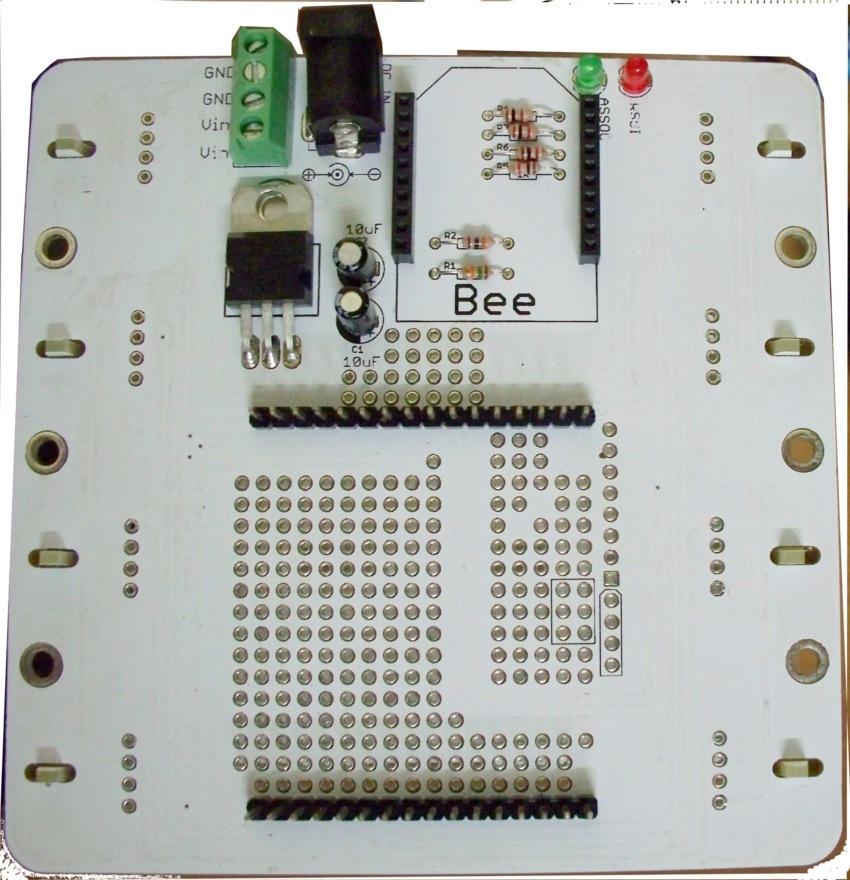
Construction
Before starting to build your Cube, please read though all the instructions first. Building the Cube is not difficult, but it will take you about 90 minutes to finish it.
Mechanical Dimensions
Assembled cube is of approx. of 10cm (l) X 10cm (b) X 12cm (h) dimension.
Understanding the Schematic
To easily understand the working of Rainbow Cube kit, a very simplified schematic is presented below. In essence, 64 RGB LEDs are arranged in a form consisting of 8 common anodes(positive pins) and 8 common cathodes(gtound pins) for each color Red, Green and Blue.
The complete schematic of RGB Cube kit is represented in a 2D RGB LED Matrix form below.
- Numbers 1 - 32 indicates the pin number of the 2x16 pin header shown above.

- The RGB Cube kit inter-connection are presented in a block diagram format. This block diagram clearly shows how the 64 LEDs in 2D form are mapped into a 3D Cube form.

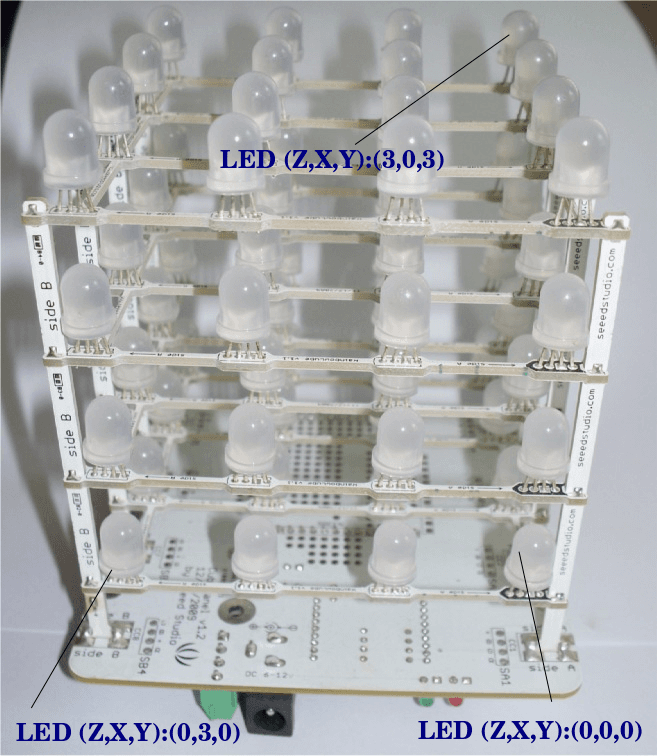
- The actual 3D positions of LEDs are marked in the below photograph.
The X,Y coordinates of 2D RGB LED Matrix is mapped to the RGB Cube kit block diagram as follows:
Locate the 2D-XY coordinate (X,Y) from RGB Cube kit block diagram
Use these (X,Y) co-ordinates with (X,Y) coordiantes of RGB Matrix to know how the LED is controlled (i.e locating VCC and Cathode pins)
For example: LED (Z,X,Y):(1,0,3) 's 2D-XY is (6,3). This LED's VCC is Pin 31. The R,G and B LED's cathode are connected to 12,25 and 4 pins respectively.
Usage
Hardware Installation
- Connect Rainbow Cube Kit 2x16 male pin header to Rainbowduino as shown below
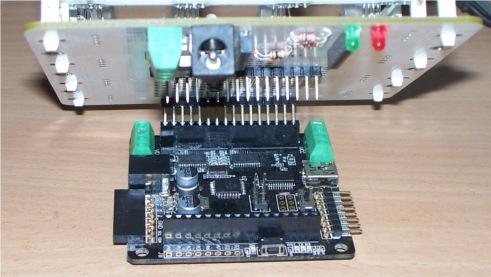
A Rainbowduino properly connected to Rainbow Cube kit
- Attach an USB cable to Rainbowduino for programming
Programming
Let us get started with a simple example:
Download Rainbowduino v3.0 Library
Open Cube1.pde sketch (a copy of it is reproduced below):
Compile and upload the sketch
/*
 Rainbowduino v3.0 Library examples:  Cube1

 Sets pixels on 3D plane (4x4x4 cube)

/*
 Rainbowduino v3.0 Library examples:  Cube1

 Sets pixels on 3D plane (4x4x4 cube)
*/

#include <Rainbowduino.h>

void setup()
{
    Rb.init(); //initialize Rainbowduino driver
}

void loop()
{
    //Set (Z,X,Y):(0,0,0) pixel BLUE
    Rb.setPixelZXY(0,0,0,0x0000FF); //uses 24bit RGB color Code

    //Set (Z,X,Y):(0,3,0) pixel RED
    Rb.setPixelZXY(0,3,0,0xFF,0,0); //uses R, G and B color bytes

    //Set (Z,X,Y):(3,0,3) pixel GREEN
    Rb.setPixelZXY(3,0,3,0x00FF00); //uses 24bit RGB color Code
}
Output
Application Programming Interfaces
In the above example, we have used few of the below APIs
init()
First we need to initialize the driver using init()
Usage:
Rb.init();//initialize Rainbowduino driver. This should be placed inside setup()
To set a LED in the 3D Cube we use the below two APIs.
setPixelZXY(Z,X,Y,R,G,B)
To set a LED (Z,X,Y) we use setPixelZXY(Z,X,Y,R,G,B).
Usage:
Rb.setPixelZXY(unsigned char x, unsigned char y, unsigned char colorR, unsigned char colorG, unsigned char colorB); //This sets the pixel (z,x,y) by specifying each channel(color) with a 8bit number.
setPixelZXY(Z,X,Y,24bRGB)
Alternatively a LED (Z,X,Y) can be set by using setPixelZXY(Z,X,Y,24bRGB).
Usage:
Rb.setPixelZXY(unsigned char z, unsigned char x, unsigned char y, uint32_t colorRGB /*24-bit RGB Color*/) //This sets the LED (z,x,y) by specifying a 24bit RGB color code
blankDisplay(void)
At times, it useful to blank all the LEDs. For this there is an API blankDisplay(void).
Usage:
Rb.blankDisplay();
//Clear the LEDs (make all LEDs blank)
Demos
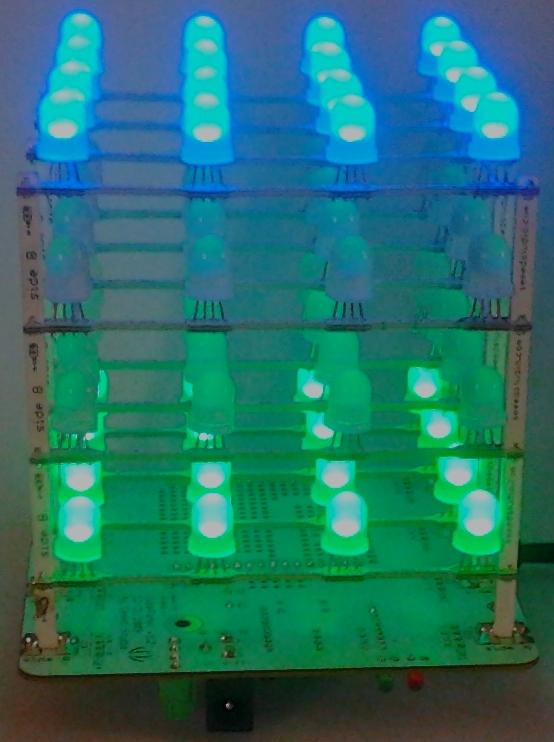
- To understand the (Z,X,Y) pixel addressing let us see the another example. In this demo, the Layer 0 (i.e Z-0) is painted Green and Layer 3 is painted Blue.
/*
 Rainbowduino v3.0 Library examples:  Cube2

 Sets pixels on 3D plane (4x4x4 cube)
*/

#include <Rainbowduino.h>

void setup()
{
    Rb.init(); //initialize Rainbowduino driver
}

unsigned int z,x,y;

void loop()
{
    for(x=0;x<4;x++)
    {
        for(y=0;y<4;y++)
        {
            //Paint layer 0 Green
            Rb.setPixelZXY(0,x,y,0x00FF00); //uses 24bit RGB color Code
        }
    }

    for(x=0;x<4;x++)
    {
        for(y=0;y<4;y++)
        {
            //Paint layer 3 Blue
            Rb.setPixelZXY(3,x,y,0x0000FF); //uses 24bit RGB color Code
        }
    }
}
Output
- In this demo, all LEDs are painted with some random color. After five seconds of delay, the whole cube is repainted with random colors.
/*
 Rainbowduino v3.0 Library examples:  Cube3

 Sets pixels on 3D plane (4x4x4 cube)

/*
 Rainbowduino v3.0 Library examples:  Cube3

 Sets pixels on 3D plane (4x4x4 cube)
*/

#include <Rainbowduino.h>

void setup()
{
    Rb.init(); //initialize Rainbowduino driver
}

unsigned int z,x,y;

void loop()
{
    for(z=0;z<4;z++)
    {
        for(x=0;x<4;x++)
        {
            for(y=0;y<4;y++)
            {
                //Paint random colors
                Rb.setPixelZXY(z,x,y,random(0xFF),random(0xFF),random(0xFF)); //uses R, G and B color bytes
            }
        }
    }
    delay(5000);
    Rb.blankDisplay(); //Clear the LEDs (make all blank)
}
Output
Third-party Demos
RGB iPhone Software (by KonchaTech)
Send RGB values to your cube via an iPhone (requires connected computer and TouchOSC software)
Ambient Visualizer Software (by KonchaTech)
Make your cube change colors in reaction to what is displayed on your computer screen (requires connected computer)
Schematic Online Viewer
Resources
Click here to download Rainbow Cube Kit
Data-sheets
Tech Support & Product Discussion
Thank you for choosing our products! We are here to provide you with different support to ensure that your experience with our products is as smooth as possible. We offer several communication channels to cater to different preferences and needs.